My first day of baking school. Back to the basics. The first technique we learned was the creaming method -- mixing air into fat and sugar to assist in the leavening process during baking. Our first homework assignment to utilize this technique was to bake a classic: Chocolate-Walnut Cookies.
With all the exotic flavor combinations that are appearing on pastry menus these days, it is easy to forget how deliciously simple a chocolate chip cookie can be. Furthermore, it is even easier to move through the motions of making an easy cookie without even thinking about the methods and skills that you are using. So for this assignment, I kept the recipe simple but focused on being more precise with my measuring, my mixing and even my portioning.
 |
| Round out the balls with your hands. |
Besides making sure that your ratio of ingredients is exact, you want to make sure that you do not over work the dough when mixing. The goal of the creaming method is to fill the butter and sugar with enough air that it makes the cookie leaven properly but also make sure that the cookie is light and fluffy. If you over cream the butter, the air bubbles in the dough will "pop" when they heat up and make the cookie spread out really thin.
 |
| Use your palms to slightly flatten the balls. |
My chef instructor asks us when we present our assignments, "What do you like about this? What can you improve?" I think that this is a nice way to think about all your baking experiments. Always recognize something good in what you have made so that you remember why you love to bake so much. But don't ever let yourself stop thinking that you can improve because if you do, you will never get better.
So what do I like about the cookies I made? They are they are moist without being gooey and they still maintain a nice crunch on the outside. What can I improve? I still need to work on my portioning, making the cookies more identical to each other. But this was only day one so I can only go up from here!
Live. Love. Bake.
Chocolate Chip-Walnut Cookies
Ingredients
5 oz butter (about 9 Tb), room temperature
5 oz white sugar
5 oz brown sugar
3 oz egg (about 2)
1 tsp vanilla
10 oz flour
1 tsp baking soda
1/2 tsp salt
8 oz chocolate chips
4 oz walnuts, chopped
Method
Ingredients
5 oz butter (about 9 Tb), room temperature
5 oz white sugar
5 oz brown sugar
3 oz egg (about 2)
1 tsp vanilla
10 oz flour
1 tsp baking soda
1/2 tsp salt
8 oz chocolate chips
4 oz walnuts, chopped
Method
- Preheat oven to 350 degrees. Grease a baking sheet lightly with cooking spray and then line with parchment paper.
- In a stand mixer with the paddle attachment, cream together the butter and the white sugar until combined; about 1 minute. Add the brown sugar to the mixer and cream until light and fluffy; about 4 more minutes. Mix eggs and vanilla together in a small bowl. Add egg mixture to the butter and sugar a little at a time, mixing as you go to incorporate.
- In another bowl, sift together flour, baking soda and salt. Add dry ingredients to the mixture. Mix until just combined, remembering to scrape down the bowl. Be careful not to over mix so that the dough doesn't become stiff.
- Remove the bowl from the stand mixer and add chocolate chips and chopped walnuts. Mix by hand to incorporate.
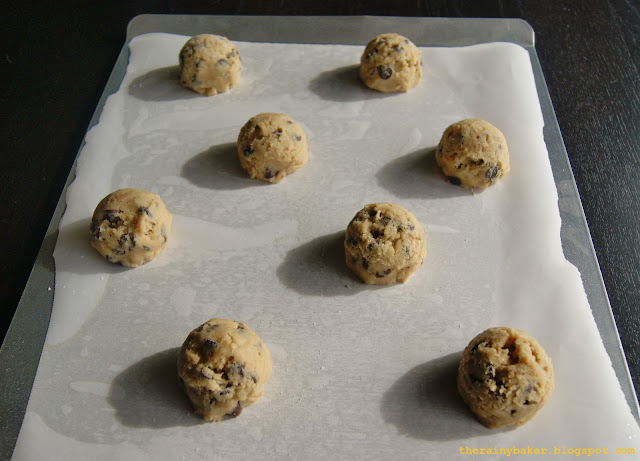
- Using an ice cream scoop, or portion scoop, drop cookie dough on the prepared cookie sheet. Make sure to stagger the cookies (see picture above) so that when they leaven they don't bake into each other. Using your hands, round out the edges of the dough balls and lightly flatten the tops with your palm.
- Bake cookies for about 8 minutes and then rotate the pan in the oven. Continue baking for another 8 minutes until the cookies are golden brown. Cooking time will vary depending on how large you make the dough balls. Just remember to check on your cookies early and often!


This is really interesting. Cant wait to hear about more of your assignments from cooking school.
ReplyDeleteAnd i always thought you just dropped the dough on the pan. Those cookies look really good. Nicely done. Now, just remember to share
ReplyDelete